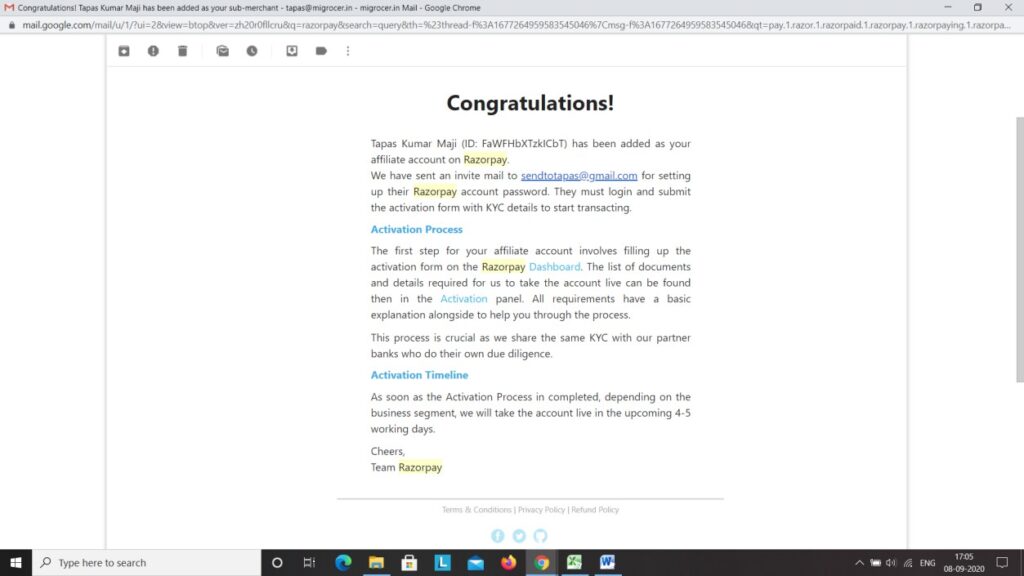
Once you register your store. An inivitation will be sent to your registered email id from Razorpay account.
Find the email from Razorpay and open, click on the ‘Create a Password’ link and choose a password.
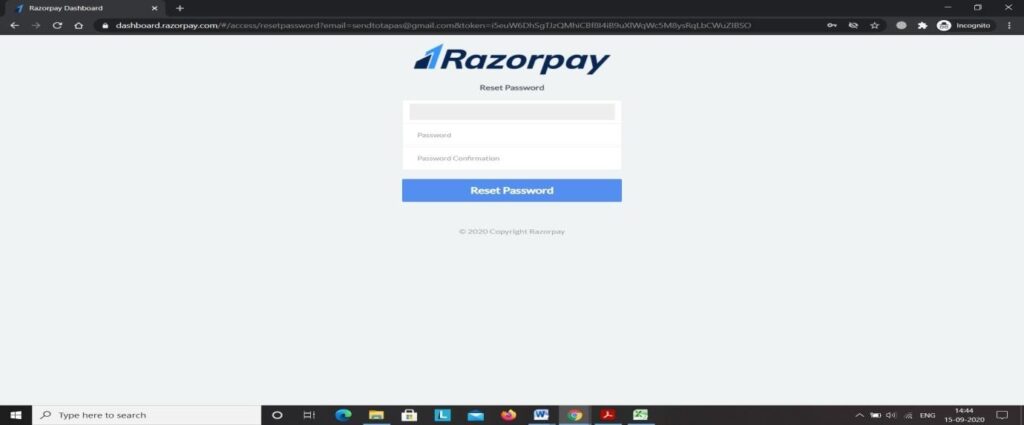
Once the password is created, access the Razorpay Dashboard and go back to email. Please click on the ‘Activation’ link and you will be redirected to Razorpay Dashboard again where you need to update the required details.
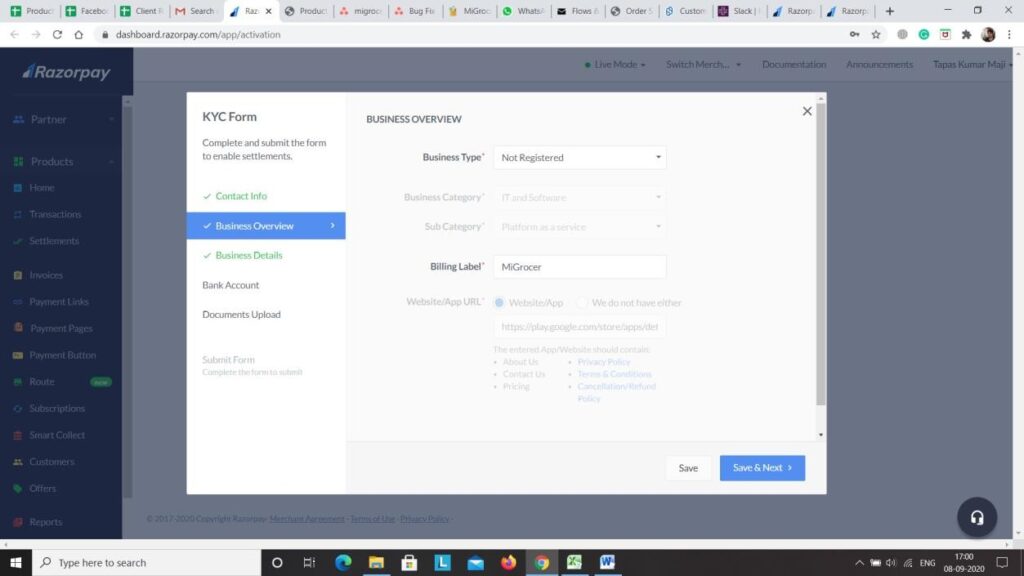
Once clicked on ‘Activation’ and landed on the Razorpay dashboard, start entering the information.
Contact Info:-
– Contact Name
– Contact Number
– Contact Email

Business Overview:-
– Business Type>Private Limited/Not Registered
– Business Category>Others
– Business Model>(Purpose)
– Billing Label>Business Name
– Contact Name URL> Contact Name
Business Details:-
– Business PAN
– Business Name
– Authorised Signatory PAN>(Same or other)
– PAN Owner’s Name
– Address
– Pin code
– City

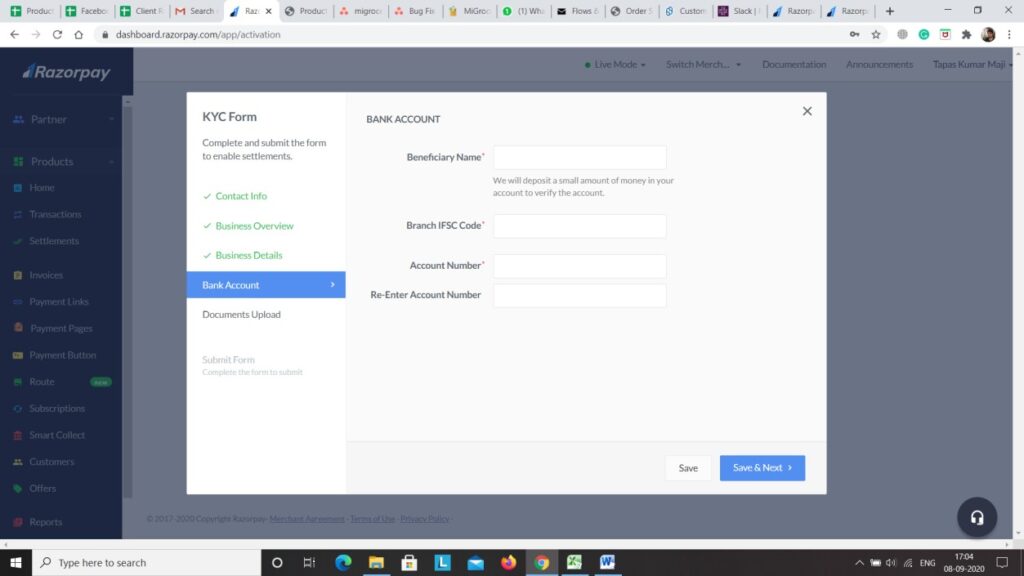
Bank Account:-
– Beneficiary Name
– Branch IFSC Code
– Account Number
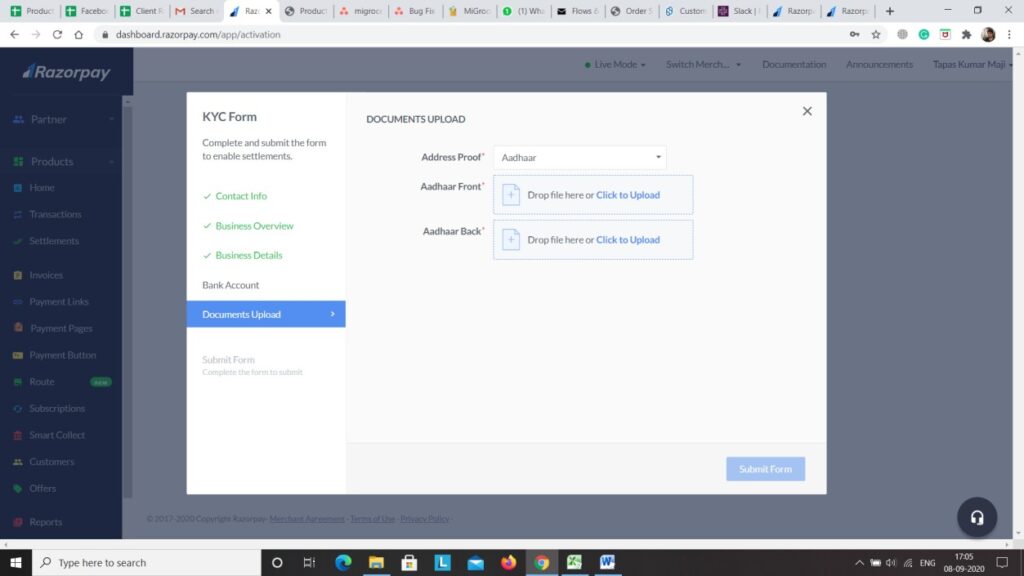
Documents Upload:-
– Authorized Signatory’s Address Proof
– Aadhaar Front>(Upload)
– Aadhaar Back(Upload)
– Business Registration Proof>(Upload)
– Company PAN(Upload)
Once you have completed the KYC form and uploaded the required document, read through the Terms and Conditions, select the checkbox on the page, if you have read and agree with the terms and conditions, and click Submit.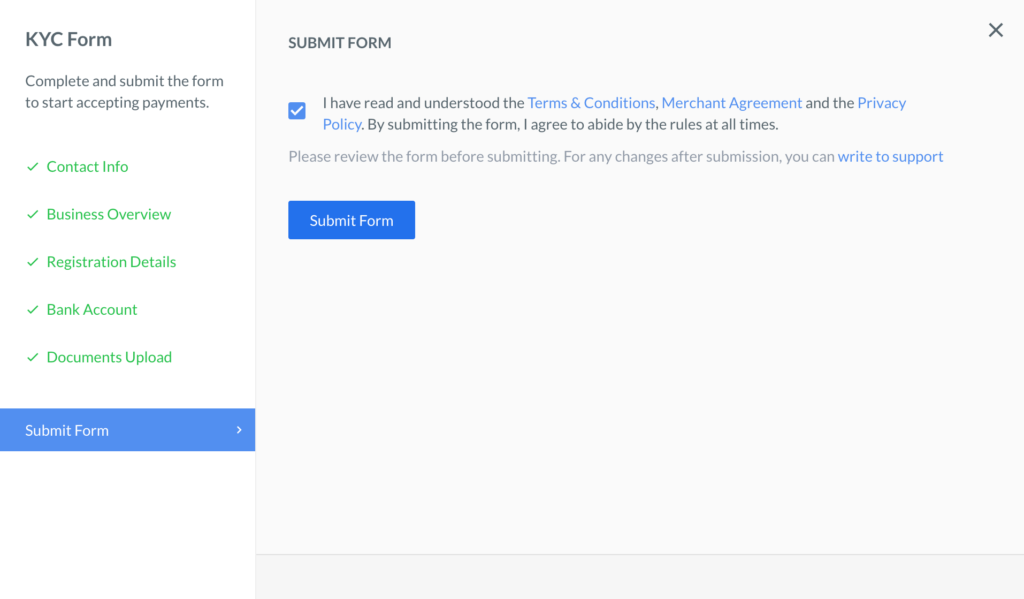
Once submitted, Razorpay starts the KYC review process. This usually takes 4-5 working days.
Once the review is done, all payments are settled to your Bank account.
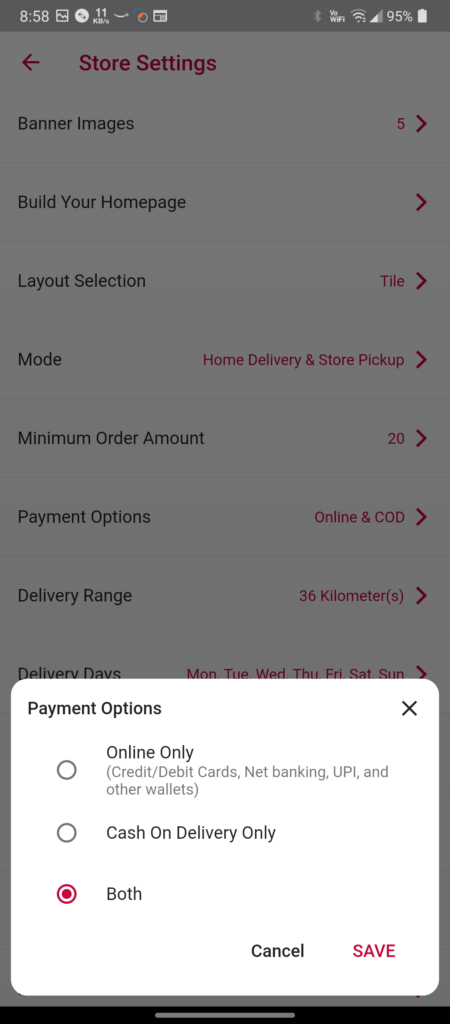
Click on the Store Settings option in the Profile section of the Migrocer Business Manager App.
Click the Payment Options button
You’ll see the below screen where you have to select the desired option.